Elasticsearch,kibana,and Elastic Agent Configuration

👋 Hi there! I'm Balaji S, a passionate technologist with a focus on AWS, Linux, DevOps, and Kubernetes.
💼 As an experienced DevOps engineer, I specialize in designing, implementing, and optimizing cloud infrastructure on AWS. I have a deep understanding of various AWS services like EC2, S3, RDS, Lambda, and more, and I leverage my expertise to architect scalable and secure solutions.
🐧 With a strong background in Linux systems administration, I'm well-versed in managing and troubleshooting Linux-based environments. I enjoy working with open-source technologies and have a knack for maximizing performance and stability in Linux systems.
⚙️ DevOps is my passion, and I thrive in bridging the gap between development and operations teams. I automate processes, streamline CI/CD pipelines, and implement robust monitoring and logging solutions to ensure continuous delivery and high availability of applications.
☸️ Kubernetes is a key part of my toolkit, and I have hands-on experience in deploying and managing containerized applications in Kubernetes clusters. I'm skilled in creating Helm charts, optimizing resource utilization, and implementing effective scaling strategies for microservices architectures.
📝 On Hashnode, I share my insights, best practices, and tutorials on topics related to AWS, Linux, DevOps, and Kubernetes. Join me on my journey as we explore the latest trends and advancements in cloud-native technologies.
✨ Let's connect and dive into the world of AWS, Linux, DevOps, and Kubernetes together!
In today's digital age, data plays a crucial role in decision-making and business operations. To effectively manage and analyze large volumes of data, organizations rely on powerful tools like Elasticsearch, Kibana, and Elastic Agent. In this blog post, we will walk you through the step-by-step process of setting up and configuring these tools on an EC2 instance.
Prerequisites:
Before we begin, ensure you have launched an EC2 instance and configured the security group to allow all traffic.
Step 1: Setting up Kibana
Download Kibana: Start by navigating to the official Kibana website and downloading the latest version of Kibana.
https://www.elastic.co/guide/en/kibana/current/targz.html
 cd /opt
 curl -O https://artifacts.elastic.co/downloads/kibana/kibana-8.9.1-linux-x86_64.tar.gz
Extract the files: Once the download is complete, navigate to the /opt directory and use the following command to extract the downloaded tar file:
tar -xzf kibana-8.9.1-linux-x86_64.tar.gz
Configure Kibana: In the new session, navigate to the Kibana configuration directory using the following procedure:
In the configuration file, locate the line that specifies
"localhost"and replace it with theprivate IPaddress of your Kibana instance. Save and exit the file.vi /opt/kibana-8.9.1/config/kibana.yml
Install Elasticsearch: Now, let's install Elasticsearch by following these steps:
Download Elasticsearch: Navigate to the official Elasticsearch website and download the latest version.
https://www.elastic.co/guide/en/elasticsearch/reference/current/targz.html
  cd /opt
  wget https://artifacts.elastic.co/downloads/elasticsearch/elasticsearch-8.9.1-linux-x86_64.tar.gz
Extract the files: Use the following command to extract the downloaded tar file:
tar -xzf elasticsearch-8.9.1-linux-x86_64.tar.gz
Open a new session: Open a new session on the same EC2 instance, but this time, log in as a normal user (not root).

Install Elasticsearch: Repeat
steps 4 and 5to install Elasticsearch in this new session as well.
Navigate to the Elasticsearch directory: Move into the Elasticsearch directory using the following command:
cd elasticsearch-8.9.1/bin
Run Elasticsearch: Start Elasticsearch by running the following command:
./elasticsearchNote: It may take a few minutes for Elasticsearch to start. Once it's up and running, it will generate a
username, password, and a token for the Kibana dashboard. Make sure to copy and save this information in a notepad for future reference.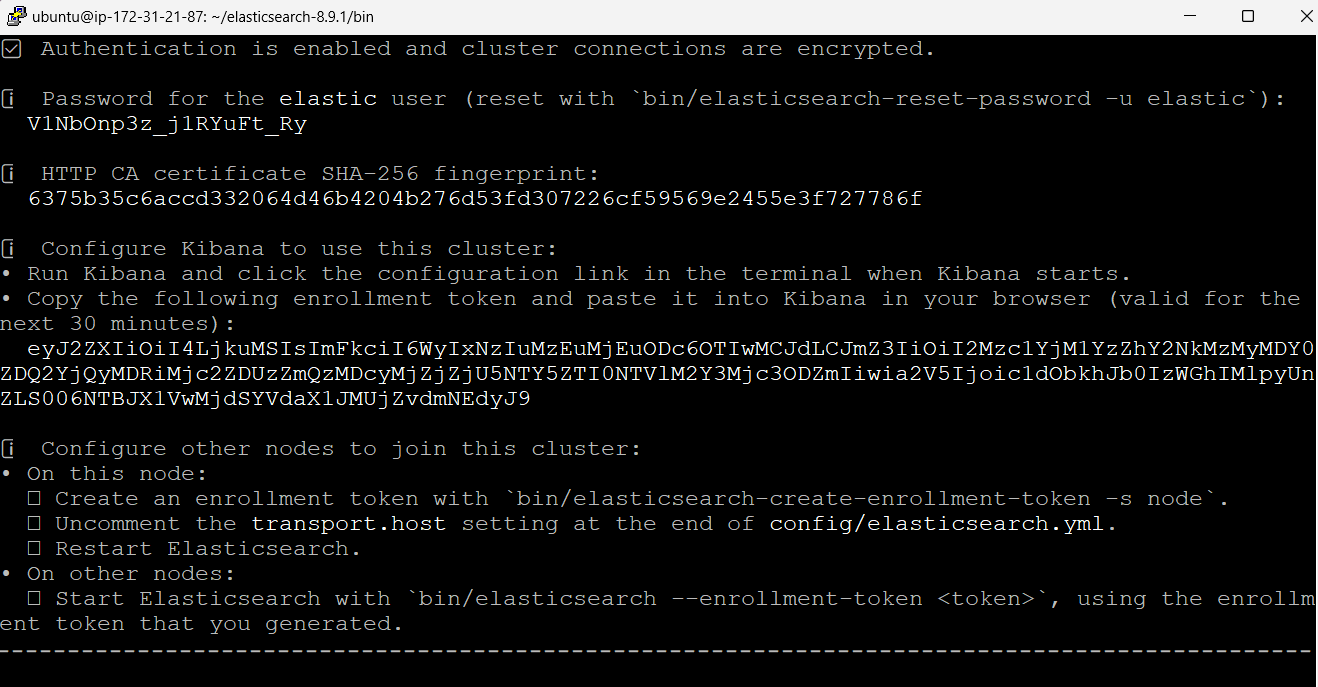
Start Kibana: Move to the Kibana bin directory using the following command:
cd /opt/kibana-8.9.1/bin
Start Kibana by running the following command:
./kibana --allow-root

Note: It may take some time for Kibana to start. Once it's up and running, you can access the Kibana dashboard in your browser by entering the public IP address of your EC2 instance.
Configure Kibana: In the Kibana dashboard, follow the provided link to configure Kibana.

Replace the private IP address with the public IP address to access it in your browser.
http://<public ip>:5601/?code=655393

Copy the enrollment token: After configuring Kibana, copy the enrollment token provided.

Wait for package configuration: Now, you need to wait for the packages to be configured. This may take a few minutes.

after, sometimes refresh the page to view
user login pageLogin to Kibana: Once the configuration is complete, you can log in to the Kibana dashboard using the generated username and password.
Username: elastic
Password: V1NbOnp3z_j1RYuFt_Ry


Step 2: Configure Elastic Agent
In the Kibana dashboard, search for "Elastic Agent" and follow the instructions to install and configure it.

Next, add elastic agent


Add elastic agent to your host

Add agent
Add Elastic Agents to your hosts to collect data and send it to the Elastic Stack.
Run an Elastic Agent standalone to configure and update the agent manually on the host where the agent is installed.
And download the policy

Install Elastic Agent on your host
Select the appropriate platform and run commands to install, enroll, and start Elastic Agent. Reuse commands to set up agents on more than one host.
Run the following commands to install elastic agent on your host

Again take PuttY and run the above commands:


Rename the elastic-agent.yml into elastic-agent.yml-bkp using the following command:
mv elastic-agent.yml elastic-agent.yml-bkp

Copy the policy to the elastic-agent.yml on the host where the Elastic Agent is installed. Modify ES_USERNAME and ES_PASSWORD in the outputs section of elastic-agent.yml to use your Elasticsearch credentials.

copy and paste the policy into elastic-agent.yml and run the command,After execution the agent is successful installed

To check

Go to Analytics and Discover to check logs

Conclusion:
Congratulations! You have successfully set up Elasticsearch, Kibana, and Elastic Agent on your EC2 instance. These powerful tools will enable you to manage and analyze your data effectively. Explore the various features and functionalities they offer to gain valuable insights and make informed decisions for your organization.


